Musings of a Data professional

Stuart Moore

Month: April 2019

dbatools’ Copy-DbaDatabase and Start-DbaMigration now supporting Azure Storage and Azure Managed Instance

Pleased to announce that we’ve now added Azure storage support to all the dbatools commands that copy databases around. This is part of our march towards full support for migrating on premise SQL Instances to Azure SQL Managed Instances

These changes also make it much much simpler to copy or migrate databases across SQL Server instances in different Active Directory domains.

Prerequisites

The features in this post are available in dbatool’s main production branch from version 0.9.807 onwards

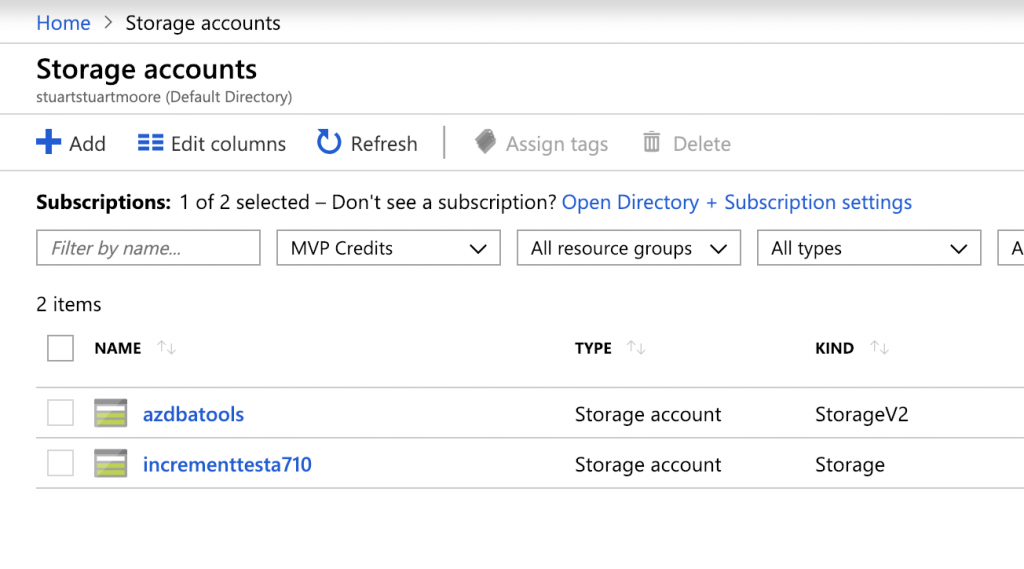
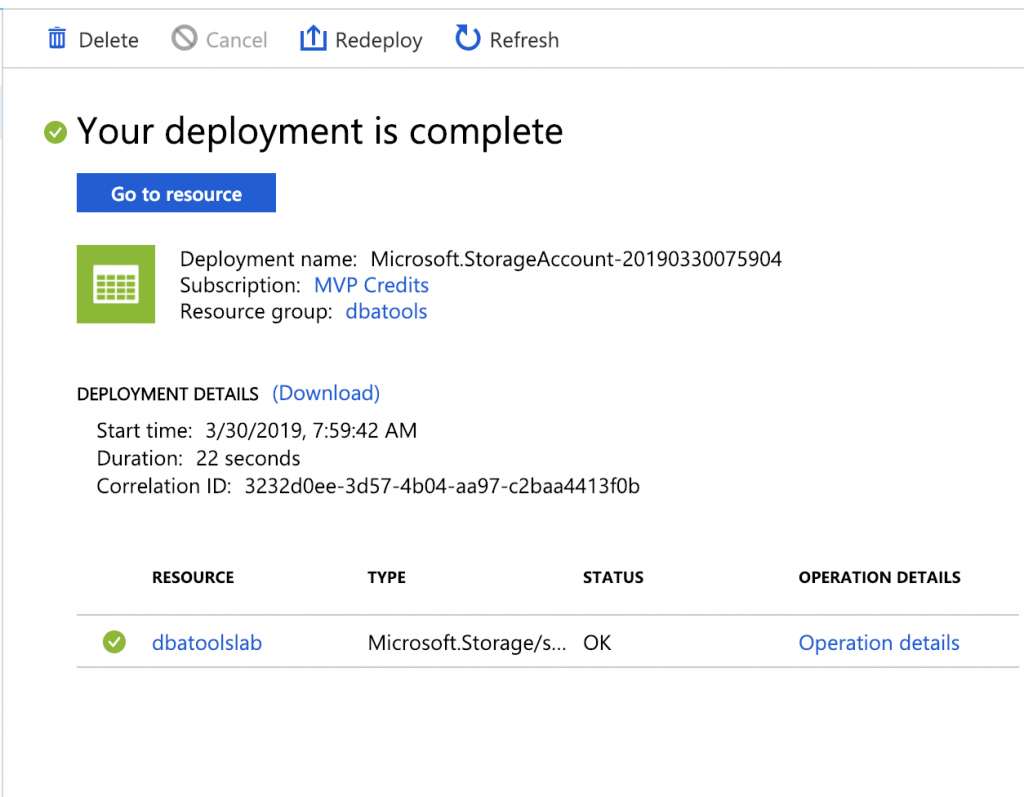
You’ll need an Azure Storage account set up, previous blog posts on doing that can be found at:

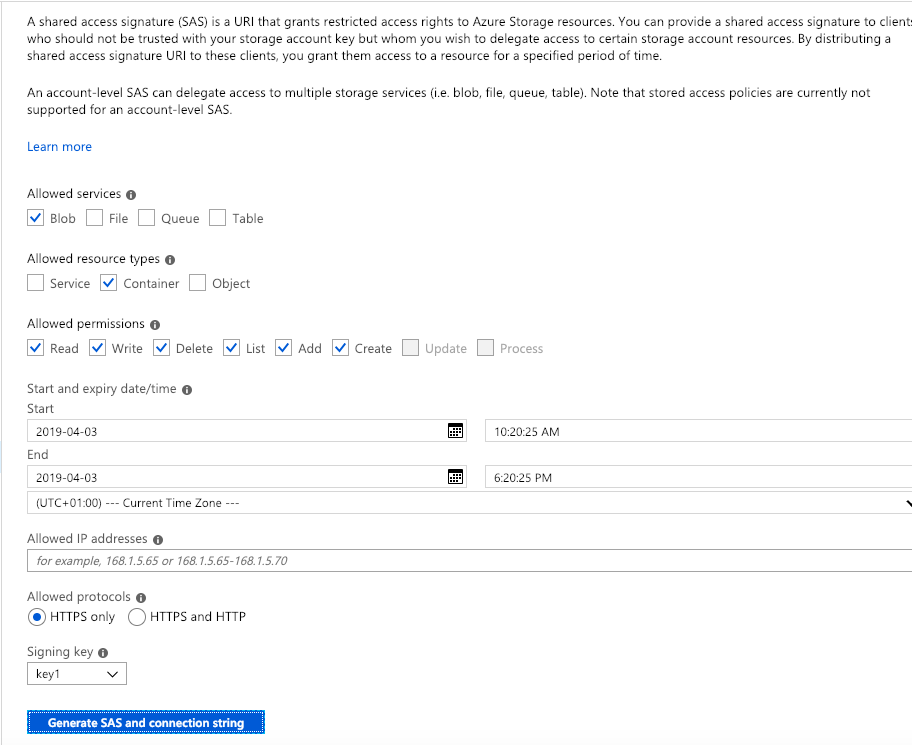
I’d highly recommend you use the Shared Access Signature method. 2 main reasons:

  • Access Key auth is deprecated in SQL Server 2016+
  • You can’t stripe or use mutiple storage accounts with Access Keys, but you can with Shared Access Signatures

Copy-DbaDatabase to Azure Managed Instance

So now you’ve got credentials on the source and destination instances, and a working storage account you’re ready to use Copy-DbaDatabase to move your database up to a Managed instance.

If you’re using Shared Access Secrets, then it’s a simple as using your storage account URL as the SharedPath:

$copyParams = @{
    Source = "Server1"
    Destination = "MyNewMI.public.cus29s972e4513d6.database.windows.net,3342"
    DestinationCredential = $cre
    SharedPath = "https://azblogdemo.blob.core.windows.net/sql"
    BackupRestore = $True
}
Copy-DbaDatabase @copyParams

The only difference is that you now pass in the URL to your blob storage account rather than a UNC path to SharedPath

If you are using Access Keys, then you will need to pass the name of the SQL credential holding them in via the AzureCredential parameter

$copyParams = @{
    Source = "Server1"
    Destination = "MyNewMI.public.cus29s972e4513d6.database.windows.net,3342"
    DestinationCredential = $cre
    SharedPath = "https://azblogdemo.blob.core.windows.net/sql"
    BackupRestore = $True
    AzureCredential = "azblogdemo"
}
Copy-DbaDatabase @copyParams

All the other parameters you’d use with Copy-DbaDatabase other than ReuseSourceFolderStructure are available. That one’s not used as Managed Instances don’t allow user to specify paths

You may still get errors when copying certain databases. At the moment we’re not checking all the internal features of a database to make sure they are compatible with Azure SQL Managed Instances.

Start-DbaMigration with Azure Managed Instances

With Copy-DbaDatabase now supporting Managed Instances we can also start making Start-DbaMigration supporting them as well.

This is a preview of where we’re going as this particular command has more moving pieces that we need to make sure are properly compliant with the differences between on premise instances and Managed Instances as linked to above.

The sections working so far are:

  • Copy-DbaDatabase, as explained above
  • Copy-DbaLogin, this will copy SQL Server logins across but not Windows logins as they are not supported in MI yet

Bonus news for cross domain transfers

A common query on the #dbatools channel on SQL Community is how to copy a database or migrate an instance between 2 SQL Instances in different Active Directory domains with no trust relationship. The SQL Server connection is fairly simple as we can use SQL Server Logins, but the shared storage is trickier.

Permissions have to be very loose, and deciding how to sort the networking out can take a while

The good news is that using Azure Storage get’s around all of those issues. Create yourself an account, create the credentials on the source and destination instances and you’re good to go.

It’s all secure. The backups are encrypted on Azure Storage, and are only accessible to those people you allow (even Microsoft can’t see them unless you give them your keys). All the file transfer is done under 2048 bit SSL encryption. Which makes it safer than having a non domain joined sever with a share opened up to everyone/everyone

Wrap up

This is iteration one in a process that we hope will make migrating to a Managed Instance as easy as we’ve made migrating across SQL instances in your own Data Centres.

Please feedback any errors or issues you come across, and we’d love to hear you feedback and ideas for improvements..

Feel free to leave them in the comment below, or drop them in to the #dbatools channel on SQL Community, or raise an issue on Github

Fixing things when you push changes to the wrong branch on Github

If you’re in a panic there’s a TL;DR version at the bottom of the page

We’ve all done it. Working for ages tracking down that elusive bug in a project. Diligently committing away on our local repo as we make small changes. We’ve found the convoluted 50 lines of tortured logic, replaced it with 5 simple easy to read lines of code and all the test have passed. So we push it backup to github and wander off to grab some a snack as a reward

Halfway to the snacks you suddenly have a nagging doubt in the back of your mind that you don’t remember starting a new branch before starting on the bug hunt.

Snack forgotten you hustle back to your desk, mistype your password twice as you try to login, and there it is. You’ve pushed directly into the main branch!

Fear and embarassment kick in. Hell, how am I going to fix this! And how much of an idiot am I going to look!

Been there, done that, got enough T-Shirts I really don’t need to buy clothes.

First off, don’t panic. You aren’t the first, and you won’t be the last. We’ll walk through some simple steps to recover from this moden faux pas (I don’t think Debrett’s cover this situation yet, but if they’d like to I’m happy to syndicate)

First off, jump on Slack/Teams/Email or whatever you use to communicate across the project to let everyone know what you’ve done. It’s much less embarrassing to do it now that when someone’s forked off of your unchecked code, or checks something in and merges with it

Now you need to get your commits out of main branch. As these have been committed there’s 2 git options to look at, revert or reset. As this is a public SNAFU then revert is the correct way to do this

A git revert creates a commit that undoes the commits you’re reverting so everything is logged in the history.

git reset will remove the evidence it ever happened from the commit history, which makes it hard to pinpoint errors if you don’t get it perfectly right

This doesn’t mean a git revert isn’t without it’s issues or potential pitfalls. But, because you alerted everyone in step 1 (you did fess up didn’t you?) you’ve got some breathing space, so take it slowly and don’t screw it up again

First you need to work out how far back you need to revert to. Your options are to revert a set number of commits or to revert to a specific commit

To revert a x commits, you’d use this syntax

git revert HEAD-x

So to revert 2 commits you’d use:

git revert HEAD-2

But how would you know how many commits to revert? That leads into the next bit, working out which commit to revert to. There are 2 options here, github or git log

Getting Commit ID from git log

git log is the more complex way of doing this, but is much more flexible. And if you’re like me and spend most of your git time on the command line then it saves finding the mouse and a different window. We’ll look at 2 command line options that should be enough to sort out anything but the worst messages

Running git log on it’s own produces a lot of verbose output:

git log showing verbose output

That’ll keep paging through as much history in that branch as has been kept. To exit just hit q

For some brevity we use the –oneline switch to just return the basic facts:

Using the oneline switch with git log

This is much easier to read, but still returns everything in the history. So let’s reduce that with the -x parameter, where x is an integer saying how many lines you want returning:

restricting the number of row git log returns

Hopefully if you’ve caught the issue quickly and warned everyone else of the issue you won’t have too many commits you need to scan. For the revert you need enough of the Commit ID to be unique, which –oneline gives you

Getting Commit ID from Github

As you’ve pushed the commits to github, github offers a nice way to see the commit history. Below is a snapshot of a repository I’ve just had to revert because I wasn’t paying attention.

To get the commit history, click on the highlighted number of commits.

Where to find git commit history on github

This pops up a history list of all the commits with their commit hash:

git history in github

There’s a handy clipboard button next to each commit to grab the Commit ID for the revert

Reverting the Commits

Now we need to revert the unwanted commits. There are 2 options. You can revert a specific number of commits from the current HEAD of the branch. For example, to revert the last 2 commits in the branch you’d use:

git revert HEAD-2

or you can revert to a specific commit id

git revert 93cd242

Personally, I always go with the commit hash. When you’re in a bit of a panic the first thing that goes for me is counting, so having an exact value to revert to saves a lot of double checking

And you can revert commit by commit if you wanted. In the example I’ve been using here I wanted to make sure exactly what was being taken out of files as I went along. So if you look a the git history from after I’d fixed things you can see 2 reverts at the top of the history

Git log history showing revert results

So now you’re reverted your local repository, the next thing you need to do it to push the changes back up to the github repository. I know you know how to do this as that’s what caused this issue in the first place!

Finally, let everyone know that they can use the main branch again and make a not to check in future

TL;DR

Let everyone know the branch is not right to stop any pulling/pushing/branching from it

Then get the commit history:

git log --oneline -20

Then revert to the CommitID before the wrong commits:

git revert <CommitID>

Finally push everything back to the origin:

git push 

Let everyone know the main branch is safe to use again.

Nottingham Global Azure Bootcamp 2019

For the last couple of years Microsoft has been encouraging communities to run a 1 day Azure focused Bootcamp event on the same day all around the world.

For 2019 we’re pleased to announce that Nottingham will be hosting one of these events for the first time on the 27th April

Sessions and speaker information are available on the website at http://www.nottsdevworkshop.co.uk/azurebootcamp/. Registration is free, so please grab a ticket at Eventbrite

If you want to find out more about the SQL Server options available on Azure, how a company used Azure to produce PDFs on a massive scale or want to get hands on with Service Fabric then we’ve got sessions and workshops for you.

Creating Azure Blob storage account for SQL Server backup and restore with PowerShell

In a previous post I looked at Creating Azure Blob storage account for SQL Server backup and restore via the portal. In this post I’m going to work through setting up the thing but using PowerShell. To me this is the simpler and easier way to do things. Most of it can be left running in the background while you drink coffee or read twitter, work smarter not harder 😉

Prequisites

For these examples I’m going to assume you’ve installed the up to date versions of these 2 PowerShell modules:

So no we’ll step through the PowerShell to setup the Azure Storage. I’ll post a screen shot after each block of code so you can see what you should expect to see. This is running on PowerShell 6.1.1 on MacOS (ain’t cross platform compatibility grand!)

TLDR; – I’ve uploaded the whole script to github in this gist – Setting up an Azure Blob container for SQL Server Backups and Restores

Setup

Import-Module dbatools
Import-Module Az

Connect-AzAccount
# Currently returns the wrong URL, use https://aka.ms/DeviceLogon instead

Subscription Check

Make sure you’re in the right subscription, here I’ve logged into my Visual Studio subscription and want to use my MVP Credits one:

#Check you're in the correct subscription
Get-AzContext
Get-AzContext -ListAvailable | Where-Object {$_.Name -Like 'MVP*'} | Set-AzContext
Get-AzContext

Check what’s there

#check existing Storage Accounts
Get-AzStorageAccount  

Create the account

Here I’m using PowerShell splatting which is a great technique to avoid stupidly long parameter strings

I’m creating this storage account with the same settings as the one I created in the post Creating Azure Blob Storage for SQL Server Backups and Restores via the Azure Portal

#we're going to use splatting
$NewStorageAccount = @{
   ResourceGroupName  = "dbatools"
   AccountName = "azblogdemo"
   Location = "Uk South"
   SKUName = "Standard_GRS"
   Kind = "StorageV2"
   AccessTier = "Hot"
   EnableHttpsTrafficOnly = $true
}
#Create the Storage Account
New-AzStorageAccount @NewStorageAccount

Getting the Access Keys

If you want to use the older Access Keys method to authenticate you’re pretty much done at this session. If you’re on a version of SQL Server that supports the Shared Access Signature method (2016 onwards), then it’s a good idea to move over to that method as it’s more secure and performs better

$AzStorageKeys = Get-AzStorageAccountKey -ResourceGroupName $NewStorageAccount.ResourceGroupName -Name $NewStorageAccount.AccountName
$AzStorageKeys
$Sql = "CREATE CREDENTIAL [$($NewStorageAccount.AccountName)] WITH IDENTITY='$($NewStorageAccount.AccountName)', SECRET = '$($AzStorageKeys[0].Value)'" 
$Sql
Invoke-DbaSql -SqlInstance server1 -Database master -Query $Sql

Onwards to Shared Access Signatures

Grab a context so we can pass it in to other cmdlets:

$AzStorageContext = New-AzStorageContext -StorageAccountName $NewStorageAccount.AccountName -StorageAccountKey $AzStorageKeys[0].Value

Now we create a new container on the Storage Context

#Create a blob container called SQL
$AzStorageContainer = New-AzStorageContainer -Context $AzStorageContext -Name sql

Create a new Shared Access Policy to the context we’ve just created


#Create a Shared Access Policy giving (r)ead, (w)rite, (l)ist and (d)elete permissions for 1 year from now
$SharedAccessPolicy = @{
    Context = $AzStorageContext
    Policy = $AzStorageContext.StorageAccountName+"Policy2"
    Container = "sql"
    ExpiryTime = (Get-Date).ToUniversalTime().AddYears(1)
    Permission = "rwld"
}
$AzSharedAccessPolicy = New-AzStorageContainerStoredAccessPolicy @SharedAccessPolicy

Now get the token for the Shared Access Policy, this is the actual ‘credential’ we need.

#Get the Shared Access Token
$AzSas = New-AzStorageContainerSASToken -Policy $SharedAccessPolicy.Policy -Context $AzStorageContext -Container sql

Grab the full URL to the sql container

#We need the URL to the blob storage container we've created:
$Url = $AzStorageContainer.CloudBlobContainer.uri.AbsoluteUri

And then a little bit of string manipulation to build our Query to create the credential

#The SASToken is prefixed with a '?' to make it easy to append to a HTTP querystring, but we don't need it, so use substring(1) to drop it
$AzSas
$SasSql = "CREATE CREDENTIAL [$Url] WITH IDENTITY='SHARED ACCESS SIGNATURE', SECRET='$($AzSas.SubString(1))'"
Invoke-DbaQuery -SqlInstance localhost -Database Master -Query $SasSql

And since we’re using dbatools to create the credentials, it’s very simple to do something like:

Invoke-DbaSqlQuery -SqlInstance server1,server2,server3 -Database Master -Query $SasSql

And then you have the credential on a number of SQL Server instances with no extra effort

The next blog in this short series will have some example of how you can then use these credentials to backup and restore via the dbatools commands

To save you piecing it togther I’ve uploaded the whole script to github in this gist – Setting up an Azure Blob container for SQL Server Backups and Restores

If you have any questions then please comment below or ping me on twitter

Creating Azure Blob storage account for SQL Server backup and restore via the portal

Since SQL Server 2012 SP1 you’ve been able to backup and restore SQL Server using Azure Blob storage. This can be useful to have offsite replicated backups or if you need to move data securely between sites, and now with Azure hosted SQL Server (of various stripes) it makes it easy to get data into those systems.

I’m just going to run through creating an Azure Blob Storage account for use with SQL Server using the Azure Portal. Another post will walk through doing the same thing using PowerShell. I normally use the PowerShell versions (no surprise there), but sometimes the graphical version is good way of understanding what’s going on under the hood.

First up, there are 2 ways that you authenticate your SQL Server with Azure storage:

Storage Account Identity with an Access Key

This is the original method introduced with SQL Server 2012, but it has been deprecated since SQL Server 2016. So it will still work, but will disappear at a time of Microsoft’s choosing.

With this method you’re handing over your Access Key, which gives the end service full rights over your storage account. As you can only have 2 active at any time, it can be hard to revoke a key if it’s being misused

Shared Access Signature

This is the more modern way of granting access to your storage. You can create as many signatures as you want, restricting to them only accessing parts of your storage account, different permissions, different expiry dates and they can be revoked individually.

So you could create one SAS for backup with create/write permissions and another for restore with read permissions to keep everything lined up.

Creating the Storage Account

Go into the Azure Portal, and find Storage Accounts (I prefer to start typing in the search box):

Ignore the ‘Classic’ option as that won’t work here. We should now have the Storage Accounts blade up:

Storage accounts in Azure Portal

Select Add to create a new storage account

Setting up a Storage account for SQL Server backup and restore

Select which subscription you want to use. You can reuse an existing resource group or create a new one. You need to give your new account a name, which must be unique in the *.blob.core.windows.net namespace. The rest of the settings you can leave along, unless you want to have a better spread of replication

Storage Account settings for SQL Server Backup and Restore

Under advanced you have a few more options. Enabling Secure transfer is a good idea, and is the default. If you need to restrict access to specific networks (if you’re using ExpressRoute for example), then you can specify them here.

Once you’ve clicked next you’ll have a chance to review your choices, and Azure will check they’re right as well.

Creating Storage container for SQL Server Backups and Restores

Click create and things will whir away in the Data Centre of your choice. After a minute or 2 your deployment will be complete.

Storage Account successfully created for SQL Server backup and restore

Creating a Blob container

Click on the Resource Name and you’ll be taken to your fresh new storage account

Storage Account successfully created for SQL Server backup and restore

Next thing we need to do is to create a container. Click on Blobs, and then on the ‘+ Container’ link

Creating Storage container for SQL Server Backups and Restores

Think of the container as a sort of folder, so give it a name. And as best practice don’t allow anonymous access unless you really want to share your backups with the world!

Access Key Authentication

Now, if you’re using the older Access key method of authenticating you’re almost done. On the Storage account main page select Access Keys under Settings:

Storage Account keys for SQL Server Backups and Restores

There you have your 2 secure access keys. Be very aware that these keys give anyone who has them TOTAL access to the storage account. There is nothing they can’t do once they have these keys. You can only have 2 active keys at any one time. You can generate a new key at any time, but it will invalidate the old one immediately. This is why you have 2 keys, so you can move over to the alternate key and then regenerate the original.

To create the credential you use the following T-SQL:

CREATE CREDENTIAL <CredentialName>
WITH IDENTITY= '<StorageAccountName>',  
SECRET = '<Secure Access Key>'

So in my example, this would look like:

CREATE CREDENTIAL dbatoolslab
WITH IDENTITY= 'dbatoolslab',  
SECRET = 'OPoyubf7gK+aIKDXm6NurzYWlv7tb2GvRb4e1qddq5E5k/2O6KcaQ9+hnRopbrJqT7eWG/h2gwKrrBgDpssPrw=='

You can call the credential whatever you want, but if you’ve multiple azure accounts then using the same name helps make sure you’re using the one you want.

Shared Access Signature authentication

For Shared Access Signature authentication we’ve another step to go. On the Overview page for you storage account, select the Shared Access Signature on the left hand side:

Shared Access Signature settings for SQL Server Backup and Restores

Here you can adjust the access that the SAS will grant to the holder. By default they are created with a life span of 8 hours which you can expand as you want. As you can generate as many SAS as you want you can create them with different permission sets for different access rights or for different services/offices via allowed IP addresses. When you hit generate you’ll be presented with:

Azure Shared Access Signatures for SQL Server Backups and Restores

The SAS token is the value you want. But without the leading ‘?’, that’s there for easy appending to a HTTP querystring, you want to start with ‘sv’

To create the SAS credential you use the following T-SQL

CREATE CREDENTIAL [https://<storageaccount>.blob.core.windows.net/<container>] 
WITH IDENTITY='SHARED ACCESS SIGNATURE' 
 , SECRET = 'SAS token' 

So in our example that would be:

CREATE CREDENTIAL [https://dbatoolslas.blob.core.windows.net/sql] 
WITH IDENTITY='SHARED ACCESS SIGNATURE' 
 , SECRET = 'sv=2018-03-28&ss=b&srt=c&sp=rwdlac&se=2019-04-03T17:20:25Z&st=2019-04-03T09:20:25Z&spr=https&sig=PLpxNQCW%2FftHsC2NFgR3f4UUSIGGOtRRPLyLG5G90Ak%3D' 

Common mistakes when creating this type of credetial are:

  • leaving a trail space on the URL in the name
  • Not removing the ? at the start of the SAS token
  • Case insensitivity in the SAS token
  • Not setting the IDENTITY value correctly, it must be SHARED ACCESS SIGNATURE

And you’re done.

This is a bit long winded, so in the post I’m going to show the quicker way of doing this via PowerShell.

If you run into any problems or anything isn’t clear hit me up in the comments or on Twitter and I’ll give you a hand

Powered by WordPress & Theme by Anders Norén